Why?
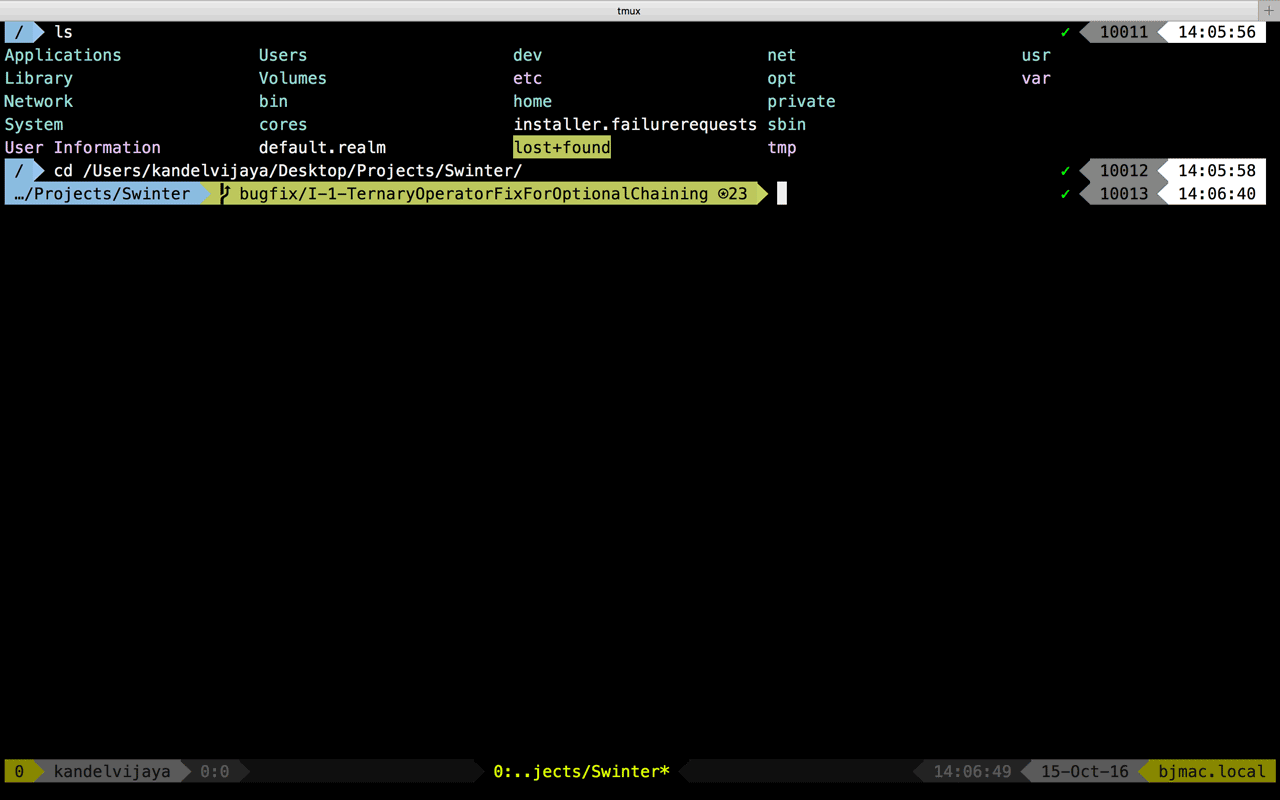
Let me show you how my terminal looks like.
I got this idea from a good friend and colleague of mine, while at work. I am always fond of good UI but I love to stick to command line when possible. Reasons: many. I love my terminal. While at work, i have 1 monitor dedicated to full screen terminal. And i love the subtle aesthetics of CLI UI.
Now, if you want similar termnial then keep reading. Not everything is easy and comes with a dmg file to double click. So be ready to type in few commadns on your uglish terminal.
Agenda
- Simple and easy customization with OH-MY-ZSH
- TMUX and beyond (Im not a tmux expert.)
- tmux theme pack and customization
- Few handy plugins
OSX default terminal UI sucks
If you ever used Ubuntu then there are 2 things you will miss. Keep Window on Top is my favorite while its beautiful Terminal is second. Ubuntu has pretty decent UI for it. On mac, it sucks. Its typing bunch of black text on white background. All monochrome.
So the dumbest upgrade first is Installing color theme for the terminal. I found Beautiful Tomorrow theme library to be really good one. There is another for those preferring Sublime Text flavor Monokai. I use Beautiful Tomorrow Bright as shown in the screenshot above.
Download any theme you like and double click .terminal file to install. Then head over to Terminal app, Preferences and then choose the theme that you installed.
Now you get the color, color highlight for file and directory. And better readability.
OH-MY-ZSH
This Open source project has more than 1000 contributors, more than Swift. Numbers doesnot tell a lot anyways. It comes with a bunch of themes and plugins.
I wouldn’t get into more detail becasue the repo site is quite self documenting. To install, copy paste the command.
$ sh -c "$(curl -fsSL https://raw.githubusercontent.com/robbyrussell/oh-my-zsh/master/tools/install.sh)"
My preferred theme is agnoster. To use this type this commands
$ cd
$ nano .zshrc
Inside nano text editor, edit the file at the Theme point. Change it from robbyrussell to agnoster
ZSH_THEME="agnoster"
Then to take this into effect, issue this command:
$ source ~/.zshrc
Theres a good chance the icons are broken and you see weird characters. Its all good. This theme uses special patched characters which, by default, the system doesnot have. To get those fonts and install them, issue this commands:
$ git clone https://github.com/powerline/fonts.git
$ sh fonts/install.sh
Now the fonts should be installed. If the terminal is not displaying the proper beautiful characters then you might want to restart the terminal. Hopefully agnoster should be up and running. You should see similar screen to this:

Few things to get done before leving for next topic
-
You probably dont want to see
[email protected]all the time, prefixxed to each command prompt. To get rid of this, do these things$ nano ~/.zshrcAnd inside the
.zshrcfile, add a line at the top.#To supress long username export DEFAULT_USER=yourusernameThen, source the modified file like so:
$ source ~/.zshrc -
You might want to make zsh your default prompt by this time.
$ chsh -s $(which zsh) -
Hopefully, you now start to enjoy terminal experience.
Powerline-status
This tool is pain in the ass to install. Python and pip default install location and brews warnings all affect how the setup goes. At least that was what happened to me. I will split this into a separate post when I’m done with it. For this we dont need the powerline-status. However, we already installed the fonts.
What was the line on the bottom of your terminal?
Good question: I used tmux. So what is tmux?
Its a windows/panes manager for terminal.
To read more about it, take 2 minutes and go thorough this awesome crash course.
Anyways, tmux uses that line to show the status of various things. And what it shows, can be customized including the color and font.
Before we proceed, we will need Brew
brew awesome package manager for OSX. I use it all the times to install and remove software.
Go on and run this command to install brew.
$ /usr/bin/ruby -e "$(curl -fsSL https://raw.githubusercontent.com/Homebrew/install/master/install)"
Now we are ready to install tmux.
tmux
To install tmux issue this commnad:
$ brew install tmux
and then to run tmux, issue this command
$ tmux
You should see a green/yellow bar with some information on the bottom. Thats already great. Keep in mind, TMUX is a session/windows/pane manager.
You can see the powerline-status docs to see how to configure tmux. I however preferred to use themes for tmux. For now, lets get out of tmux by $ exit
Using tmux-thempack
Issue the following command:
$ cd
$ git clone https://github.com/jimeh/tmux-themepack.git ~/.tmux-themepack
Create a .tmux.conf file if there is none. Else we will use that.
$ touch .tmux.conf
$ nano .tmux.conf
Add this line to the tmux.conf file
source "${HOME}/.tmux-themepack/powerline/block/green.tmuxtheme"
And here you can choose a theme. I personally use green. To use that replace the current line you inserted with this one.
source "${HOME}/.tmux-themepack/powerline/double/green.tmuxtheme"
Start tmux,
$ tmux
And if you dont see the changes or the expected theme, then $ exit.
$ cd
$ cd .tmux-themepack
$ sh themepack.tmux
And if the default (Blue) theme is applied, then edit the themepack.tmux file. Inside the file there is a declaration,
default_theme='double/blue'
Change this to whichever one you like. Then run $ sh themepack-tmux.sh to see the effect.
Now you can see the bottom status bar. This theme uses powerline styles.
4. Few handy plugins
I hope this is already too much. Forgive me if i did some typo and made your head sping for little longer. I aggregated this knowledge because i spent almost a day shuffling all over the internet to get powerline and tmux working like i wanted. Hope this helps.
For the plugins and more themes, i will update the post sometime later. I think i already took wrote quite long.
Next up: Powerline9K to boost up your git workflow. And my personal git aliases ontop.
Cheers!